January 2003 - I had been working extra during the Christmas holiday, and set out to buy a kick-ass laptop for my newly-earned money. After surfing around for offers, I decided on a Dell Inspiron 2650. I remember my pride when I showed off my new companion to all of my friends. There was no end to its capabilites... or was there? A few years later, I had almost retired the Inspiron. The puny 20 GB hard drive and 256 MB memory, and the insatiable apetite for system resources of the pre-installed Windows XP was a combination that made me choose my stationary computer for almost all computer tasks. I had even started thinking about buying a new laptop, but
Russ Newquist's weblog opened my eyes to the possibility of upgrading the Inspiron to squeeze another couple of years out of it. Please reconsider if this is something that you are thinking about doing yourself. My warranty had expired a long time ago, and I was prepared for the possibility that what I was about to do could damage the system beyond repair. Still, my heart almost stopped when the computer refused to boot up after I had replaced a memory module. It turned out that the only problem was that the memory module wasn't properly inserted, luckily. Anyway, if you decide to follow this upgrading guide, you cannot say that you haven't been warned. Also note that upgrading to a faster hard drive will
seriously affect the lifetime of the battery. I never run the laptop on batteries myself, so for me that wasn't an issue. With that said, upgrading the computer (together with switching to Gentoo Linux instead of Win XP) has made me switch back to using the laptop almost exlusively. Is it faster now? I never think about the laptop being slow anymore, so the answer has to be yes! Enough said, let's get on with upgrading the Inspiron.
I replaced the two memory modules in the Inspiron, as the laptop was equipped with a 2x128MB configuration. The maximum amount of memory the Inspiron can handle is 2x256MB for a total of 512MB. The old memory modules were PC2100 SODIMMs. I bought two PC2700 SODIMMs, as these were the slowest available. As for the hard drive, I went for a 100GB 7200rpm Seagate 2.5'' hard drive with 8MB cache, a major improvement over the old 4200rpm one.
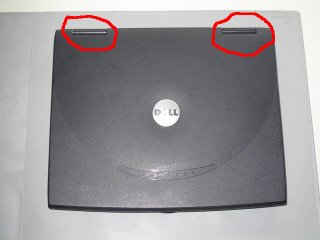
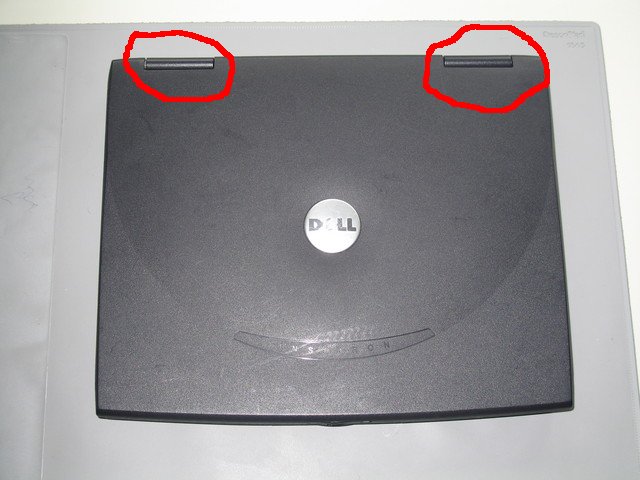
We'll take the hardest part first - replacing one of the memory modules located under the keyboard. Start by removing two screws on the back of the hinges that hold the screen.

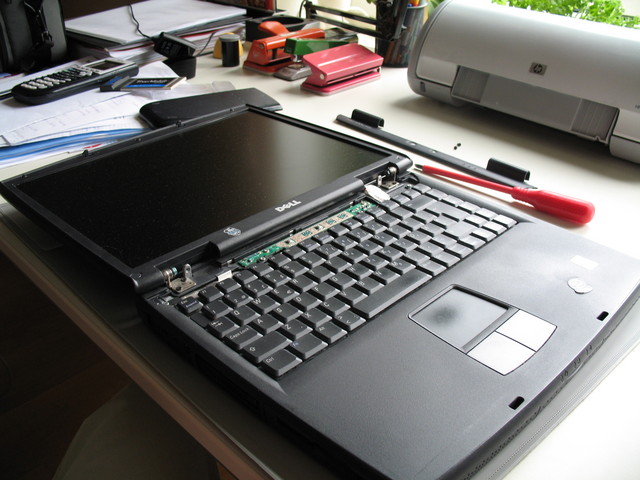
Flip the screen as far back as possible, and remove the plastic part covering the power button by gently prying it off with a screwdriver.
There are four screws holding the keyboard in place. Remove these and
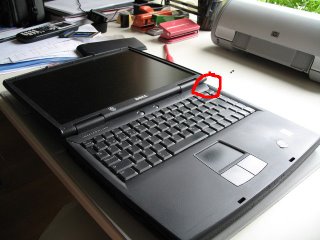
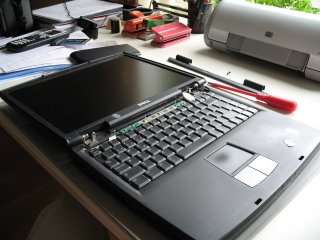
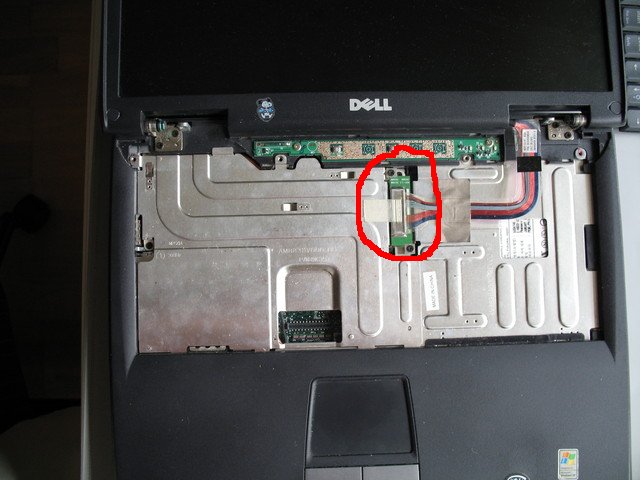
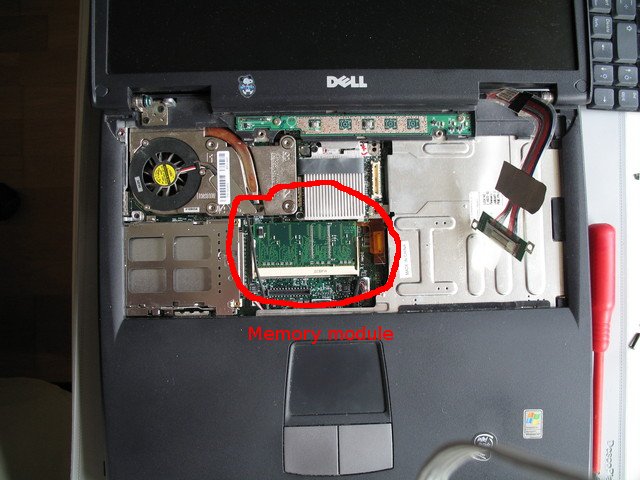
gently lift off the keyboard. Be careful not to damage the flat cable attaching the keyboard to the mother board. Detatch the keyboard connector from the mother board. Continue by removing the screws holding the plate with a hole for the keyboard connector in place and the screws on the screen connector, shown in red below.
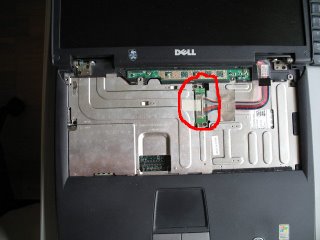
Remove the plate and replace the memory module.

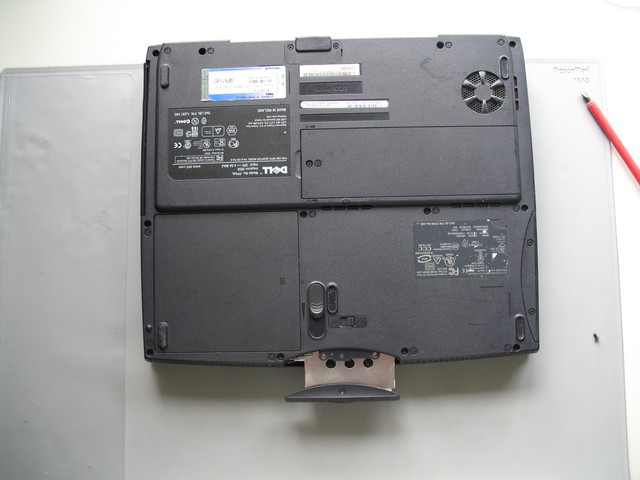
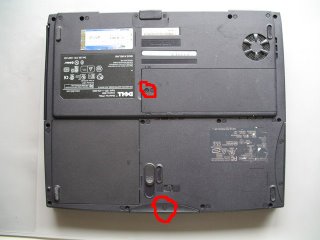
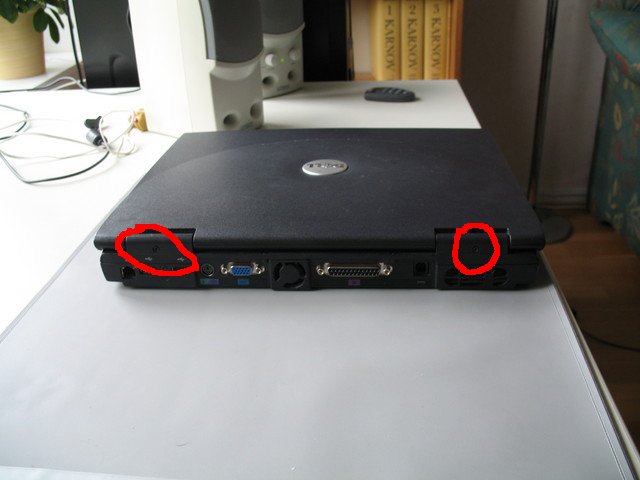
Retrace your steps to reassemble the computer. Now turn the laptop over and remove the screw that lets you access the other memory module. Shown below is also the location of the screw giving you access to the hard drive.
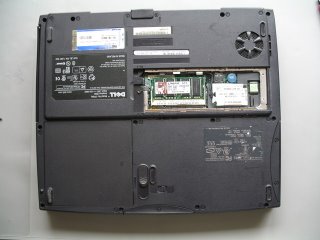
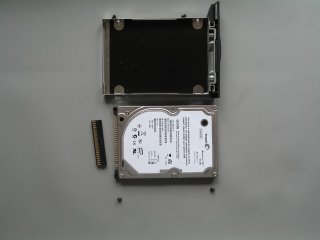
The memory modules are done, and it's time to turn our attention to the hard drive. This part is surprisingly easy. Remove the screw and slide the old hard drive out. Remove four screws on the side to remove the hard drive from the caddy. Remove the connector from the old hard drive and put it on the new one. Reassemble the caddy and slide it in the computer. Good luck!


 Retrace your steps to reassemble the computer. Now turn the laptop over and remove the screw that lets you access the other memory module. Shown below is also the location of the screw giving you access to the hard drive.
 The memory modules are done, and it's time to turn our attention to the hard drive. This part is surprisingly easy. Remove the screw and slide the old hard drive out. Remove four screws on the side to remove the hard drive from the caddy. Remove the connector from the old hard drive and put it on the new one. Reassemble the caddy and slide it in the computer. Good luck!